Style the WooCommerce Stripe Payment Form
When you’re using the official WooCommerce Stripe Payment Gateway, the default payment form provided by Stripe is a bit boring, and most probably doesn’t fit in with the style and branding of your checkout. You’ve probably tried styling it with custom CSS, but found that doesn’t work (it’s because the form is in an iframe provided by Stripe to make sure that it’s secure).
Stripe makes it possible to style certain parts of the form, but there aren’t any settings in WooCommerce to make this simple. It can be done however using some custom code. The WooCommerce plugin uses JavaScript to get Stripe to render the payment form iframe. They provide a hook that allows you to insert your own styles into the JavaScript.
It’s worth noting that you only need to do the steps in this guide to style the actual form inputs. They’re the bits that are rendered as iframes. The rest of the form (like the labels) are actually rendered by the WooCommerce Stripe plugin, so can be styled in the normal way (by adding CSS to your site through the Customizer or your own style sheet).
Note
What styles can I use?
Stripe only allows you to use a few CSS properties to style the payment form. Below is a list of allowed properties, along with the corresponding JavaScript property that you’re going to need to use to set them (more on that soon).
| Allowed CSS Property | Corresponding JS Property |
| background-color | backgroundColor |
| color | color |
| font-family | fontFamily |
| font-size | fontSize |
| font-smoothing | fontSmoothing |
| font-style | fontStyle |
| font-variant | fontVariant |
| font-weight | fontWeight |
| line-height | lineHeight |
| letter-spacing | letterSpacing |
| text-align | textAlign |
| padding | padding |
| text-decoration | textDecoration |
| text-shadow | textShadow |
| text-transform | textTransform |
| A custom property, used to set the color of the icons | iconColor |
What parts of the form can I style?
Stripe provides four areas where your styles can be applied to. These are listed below. You’ll see exactly how they’re used in the examples further down.
base– This applies styles to the whole form, unless they’re overridden by other styles.complete– This applies styles to form fields that have a valid inputempty– This applies styles to form fields that have no customer input yetinvalid– This applies styles to form fields that have an invalid input
Stripe also allows you to use the following pseudo-classes and pseudo-elements to further style the form:
:hover:focus::placeholder::selection:-webkit-autofill:disabled::-ms-clear
Styling the form
All of the above may seem really confusing at the moment, especially if you’re not used to JavaScript or CSS, but don’t worry, we’re about to show you some examples which will hopefully make everything fall in place. You’ll notice that all of the examples are actually in PHP, that’s because we’re hooking in to where WooCommerce passes the styles to the JavaScript using PHP. Basically what we’re doing is passing an array of styles to Stripe. The code we’re going to use goes into the functions.php file of your child theme (unless otherwise stated).
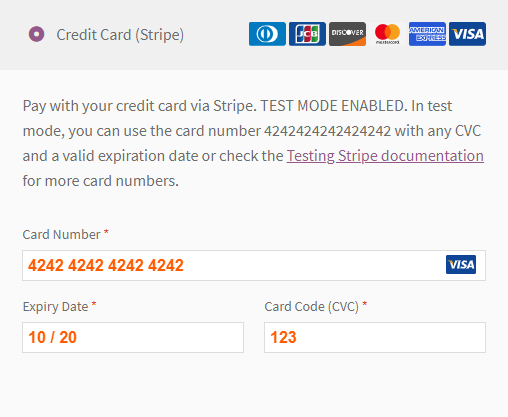
Example 1
First of all, we’re going to apply some basic styles to the Stripe Payment Form. In this example, we’re:
- Making the text in the inputs orange (#FF5C00)
- Making the text in the inputs 16px in size
- Making the text in the inputs bold
add_filter("wc_stripe_elements_styling", "snippetpress_style_stripe_1");
function snippetpress_style_stripe_1($styles) {
    $styles = array(
        "base" => array(
            "color" => "#FF5C00",
            "fontSize" => "16px",
            "fontWeight" => "bold",
        ),
    );
    return $styles;
}
Did you notice that we used the JavaScript properties of the CSS that we wanted to apply? So looking at the available properties table further up in this post, you’ll notice that to change the font-size CSS property, we use the JavaScript property fontSize.
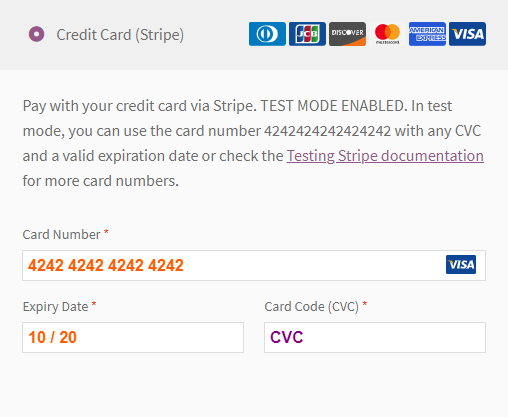
Example 2
This time we’re going to apply the same styles as before, but also style the placeholder text. So in this example we’re:
- Making the text in the inputs orange (#FF5C00)
- Making the text in the inputs 16px in size
- Making the text in the inputs bold
- Making the placeholder text purple
add_filter("wc_stripe_elements_styling", "snippetpress_style_stripe_1");
function snippetpress_style_stripe_1($styles) {
    $styles = array(
        "base" => array(
            "color" => "#FF5C00",
            "fontSize" => "16px",
            "fontWeight" => "bold",
            "::placeholder" => array(
                "color" => "purple",
            ),
        ),
    );
    return $styles;
}
Example 3
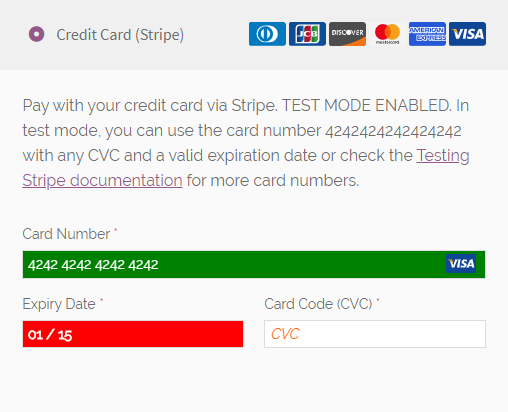
Now we’re going to take a look at styling an invalid field. In this example, we’re going to:
- Make the invalid field background color red
- Make the invalid field text white
- Make the invalid field text bold
add_filter("wc_stripe_elements_styling", "snippetpress_style_stripe_1");
function snippetpress_style_stripe_1($styles) {
    $styles = array(
        "invalid" => array(
            "backgroundColor" => "red",
            "color" => "white",
            "fontWeight" => "bold",
        ),
    );
    return $styles;
}
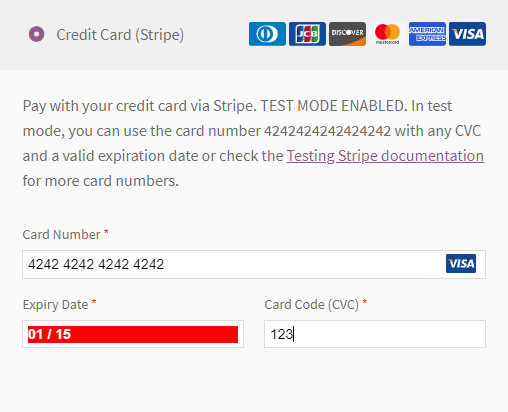
Okay, so it’s showing red, but there’s a horrible white border around the input. We need to style that differently, because that part isn’t actually the iframe, that part is done by the WooCommerce Stripe plugin. So we can target the white border using normal CSS by adding the following to the Additional CSS in your themes Customizer:
.wc-stripe-elements-field.invalid {
    background-color: red;
}
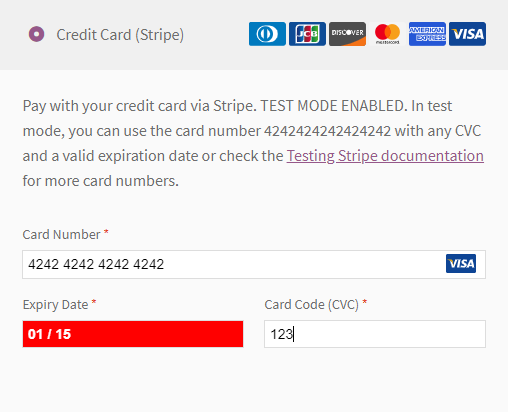
Ahhh, that’s better!
Example 4
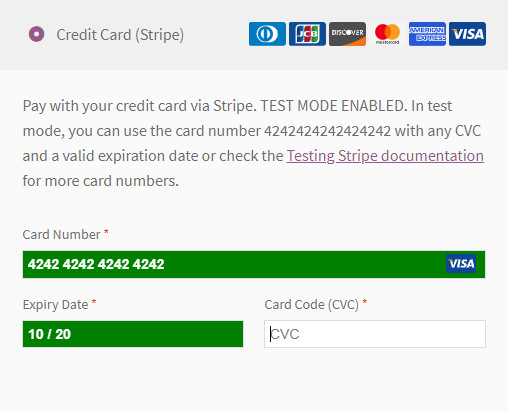
Now we’re going to look at styling the valid completed fields. This will be very similar to styling the invalid fields in Example 3. In this example, we’re:
- Make the valid completed field background color green
- Make the valid completed field text white
- Make the valid completed field text bold
add_filter("wc_stripe_elements_styling", "snippetpress_style_stripe_1");
function snippetpress_style_stripe_1($styles) {
    $styles = array(
        "complete" => array(
            "backgroundColor" => "green",
            "color" => "white",
            "fontWeight" => "bold",
        ),
    );
    return $styles;
}
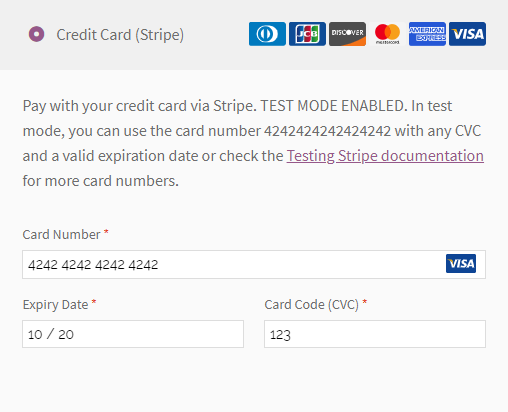
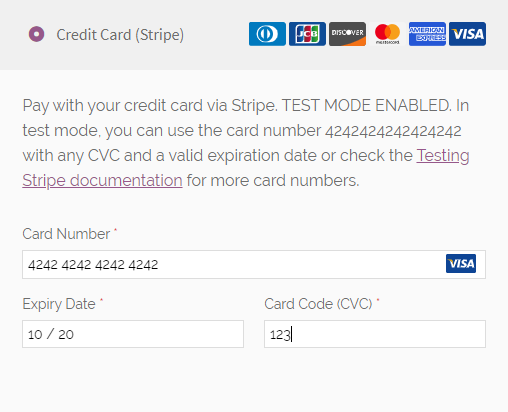
Again, we’ll need to add some CSS to the Additional CSS section of the Customizer in order to not have that horrible white border:
.wc-stripe-elements-field.StripeElement--complete {
    background-color: green;
}
Example 5
Now we’re going to look at changing the font. This is a little more complicated, as if you want to use a custom font (for example, a Google Font), you first need to tell Stripe where to get the font from. So we need an extra bit of code where we point Stripe to the fonts stylesheet. In this example, we’re going to use the Raleway font from Google Fonts. The stylesheet for this font can be found at https://fonts.googleapis.com/css2?family=Raleway, so that’s where we’ll tell Stripe to find it. We can then use our code as normal to style the form with the chosen font:
// First we have to tell Stripe where to find the font
add_filter("wc_stripe_elements_options", "snippetpress_style_stripe_font");
function snippetpress_style_stripe_font($options) {
    $options["fonts"] = array(
        array(
            "cssSrc" => "https://fonts.googleapis.com/css?family=Raleway", // Replace this URL with the link to your fonts stylesheet
        ),
    );
    return $options;
}

// Then we style our Stripe form as usual
add_filter("wc_stripe_elements_styling", "snippetpress_style_stripe_5");
function snippetpress_style_stripe_5($styles) {
    $styles = array(
        "base" => array(
            "fontFamily" => "Raleway",
        ),
    );
    return $styles;
}
Remember, we’re only styling the form inputs, the rest of the text in the form (like the labels) is styled using CSS as normal. So we can add the following to the Additional CSS in the Customizer to style the rest of the text if it isn’t already styled:
.payment_box.payment_method_stripe {
    font-family: "Raleway";
}
Putting it all together
We’ve had a look at five examples of different ways to style the Stripe Payment Form in WooCommerce. Now lets put it all together and apply styles to the base form, the completed valid fields, the invalid fields and the empty fields, all in one go. In this final example, we’re going to:
- Set the font for the whole form to Raleway
- Set the text to be orange (#FF5C00)
- Set the placeholder text to be orange (#FF5C00)
- Set the completed valid fields to have a green background with white text (overriding the orange text)
- Set the invalid fields to have a red background with bold white text (overriding the orange text)
- Set the empty fields to have italic font
add_filter("wc_stripe_elements_options", "snippetpress_style_stripe_font");
function snippetpress_style_stripe_font($options) {
    $options["fonts"] = array(
        array(
            "cssSrc" => "https://fonts.googleapis.com/css?family=Raleway",
        ),
    );
    return $options;
}

add_filter("wc_stripe_elements_styling", "snippetpress_style_stripe_6");
function snippetpress_style_stripe_6($styles) {
    $styles = array(
        "base" => array(
            "fontFamily" => "Raleway",
            "color" => "#FF5C00",
            "::placeholder" => array(
                "color" => "#FF5C00",
            ),
        ),
        "complete" => array(
            "backgroundColor" => "green",
            "color" => "white",
        ),
        "invalid" => array(
            "backgroundColor" => "red",
            "color" => "white",
            "fontWeight" => "bold",
        ),
        "empty" => array(
            "fontStyle" => "italic",
        ),
    );
    return $styles;
}
Again, we also need to add some CSS to the Additional CSS of the Customizer to style the rest of the form, and the padding around the fields:
.payment_box.payment_method_stripe {
    font-family: "Raleway";
}

.wc-stripe-elements-field.invalid {
    background-color: red;
}

.wc-stripe-elements-field.StripeElement--complete {
    background-color: green;
}
And there you have it, you can now style the Stripe Payment Form on your WooCommerce checkout so that it better matches your brand. It was a bit of a long post today, with lots of examples, but it was quite a tough one to explain. I hope that it all made sense, let me know in the comments if it works for you or if you have any issues!
For the more adventurous of you, you can check out the official Stripe documentation regarding what we’ve covered today here.
Where to add the snippet?
Whichever snippet you choose to use, you should place it at the bottom of the functions.php file of your child theme. Make sure you know what you’re doing when editing this file. Alternatively, you can use a plugin such as Code Snippets to add the custom code to your WordPress site. If you need further guidance on how to add the code, check out our post on How to Add WordPress Snippets.