How to Edit the wp-config.php File
Whilst customizing your WordPress site, you may come across guides and tutorials that tell you to edit your wp-config.php file, and you may be left scratching your head about how to do that! Well fear not, in this guide we’re going to explain to you exactly what the wp-config file is, where to find it, and how you can edit it.
What is the wp-config.php file?
First things first, what even is the wp-config.php file? Well, as the name suggests, it’s the file that contains the configuration for your WordPress site. It’s vital to the functioning of your website, containing important things like your database credentials. Without the wp-config file, your site won’t work!
You may remember that when you first installed WordPress you were asked a few questions about your database.
When you answer these questions, WordPress generates the wp-config file, and your site is born.
Because the wp-config.php file is so vital to your site, it’s recommended to leave well alone unless you have no choice. Considering that you’re reading this post, you probably fall into this category and have an important customization to implement on your site and need to edit the wp-config file to do it. Right, so let’s crack on…
Editing the wp-config.php file
Before you go ahead making changes to your wp-config file, it’s highly recommended to make a complete backup of your WordPress site. There’s several backup plugins available, but the one we’d recommend using is BackupBuddy, or you can use your web hosts backup feature if they have one.
Now you’ve got a backup of your site, let’s dive in and look at how to edit the wp-config.php file…
1. You’re going to need an FTP client. This is a piece of software that allows you to transfer files between your website and your computer. We recommend FileZilla, and that’s what we’ll be using in this tutorial. So if you don’t already have FileZilla, go ahead and download and install it from filezilla-project.org.
2. Open FileZilla and enter your sites FTP credentials in the top to log in. You can get these credentials from your web hosting provider. You’ll need:
- Your sites host (it’s IP address)
- Your FTP username
- Your FTP password
- The FTP port

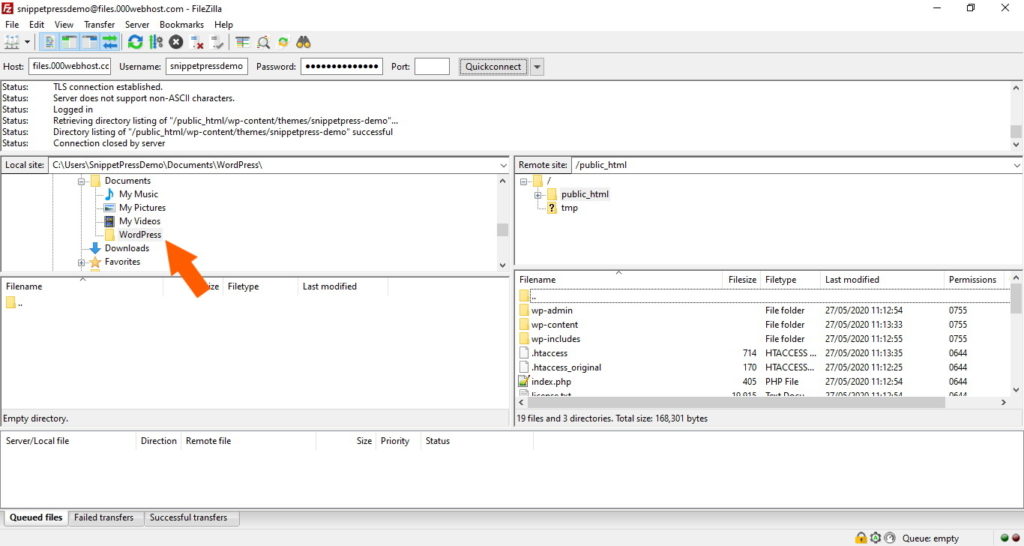
3. Once you’re logged in, you’ll see your website files in the right hand box called Remote site. The exact structure will depend on your web host. You now need to navigate to your WordPress install. In our case, this is in the public_html folder:
Double clicking on this will open up our WordPress install. If you don’t have a public_html folder, check with your web host exactly where you can find your WordPress install. Once you’re in your install, it should look like this:

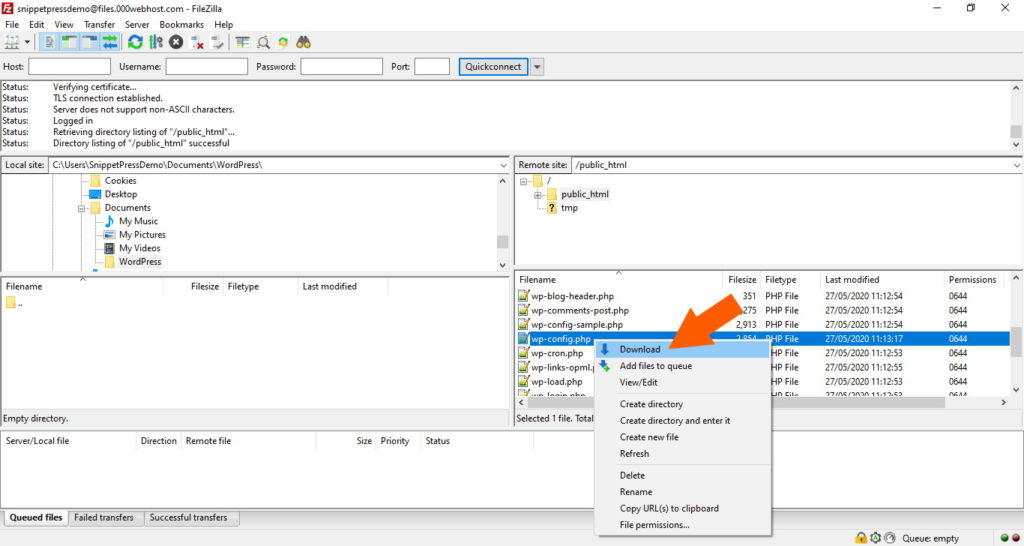
4. Within the list of files in your WordPress install you should see one that looks familiar. That’s right, the wp-config.php file is located right there in the root of your WordPress install. You’re going to be downloading the file to your computer in order to edit it, so in the left hand box called Local site, navigate to a folder on your computer where you want to download the file to. We like to create a dedicated folder in our documents called WordPress so that we can easily find the file, but that’s entirely up to you.
5. Now you can download the wp-config.php file by right clicking on it and clicking Download. This will download it to the folder on your computer that’s shown in the left hand Local site box.
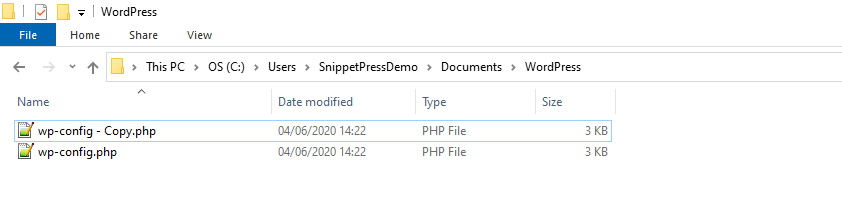
6. The wp-config.php file is now on your computer, but before you edit it, go ahead and make a copy of it, just in case anything goes wrong. I know that you did a backup (you did, right?) of your site before you began, but if things go wrong then it’ll be easier to go back to this step if you make a copy of the file too, rather than have to reinstall the backup. Of course, if things go really wrong, at least you have your full site backup too!
7. Now you’ve made a copy, you can go ahead and open the file in whatever text editor you like. We use Notepad++, which can be downloaded for free from notepad-plus-plus.org, but you can use the default Windows or Mac text editor if you like.
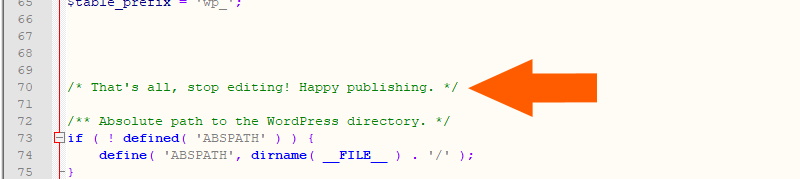
8. Once you’ve opened the wp-config.php file, you’ll see something like this:
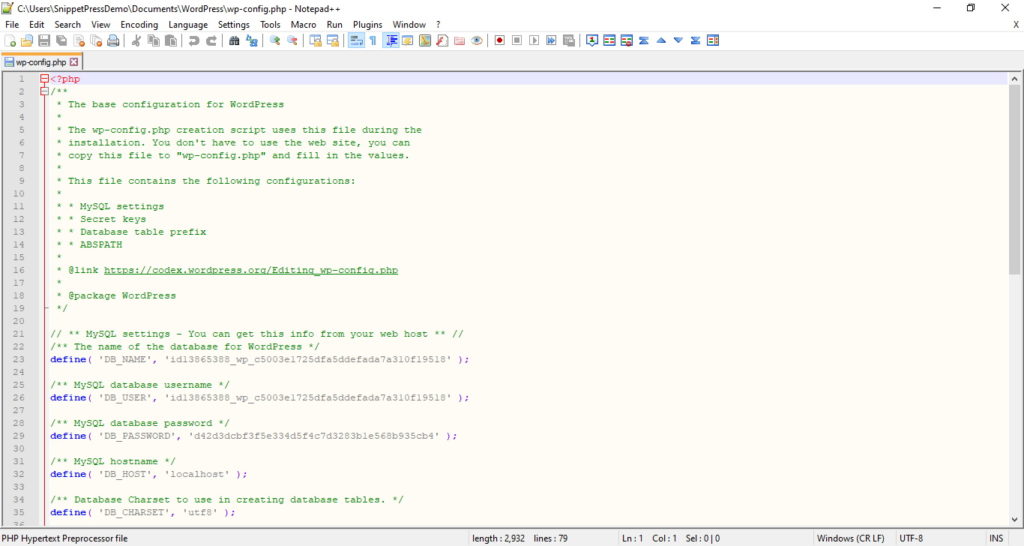
Scroll down until you see a line that says /* That's all, stop editing! Happy blogging. */
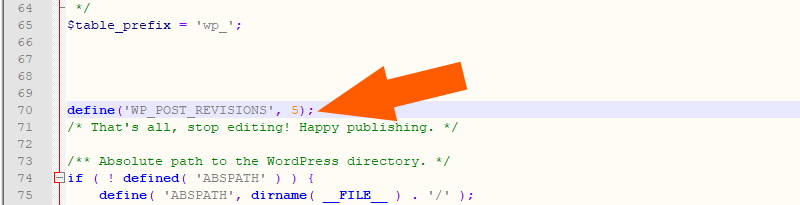
9. You can now add the code that you need to ABOVE that line. In the example below, the code we’ve added is to limit the number of post revisions that WordPress stores to 5. Your code may be different, but the important thing here is to make sure that the code you add goes ABOVE the /* That's all, stop editing! Happy blogging. */ line! I think you get the message 😉
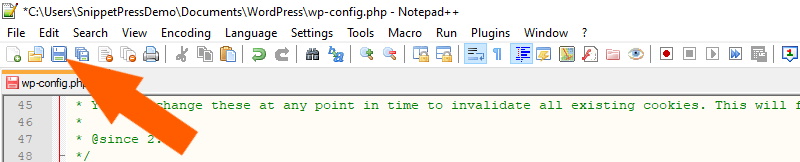
10. Once you’ve finished adding your code, go ahead and click save. You can now close your text editor.
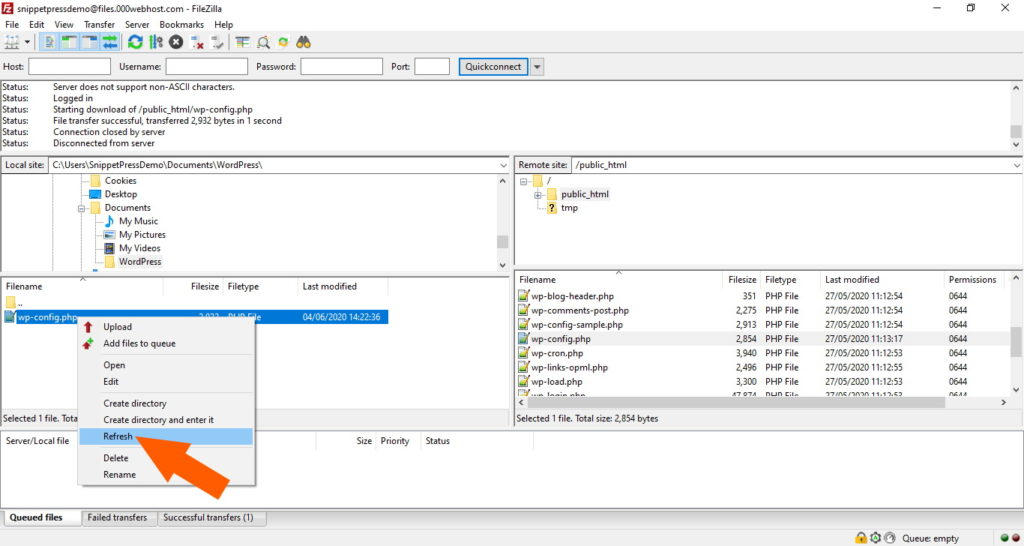
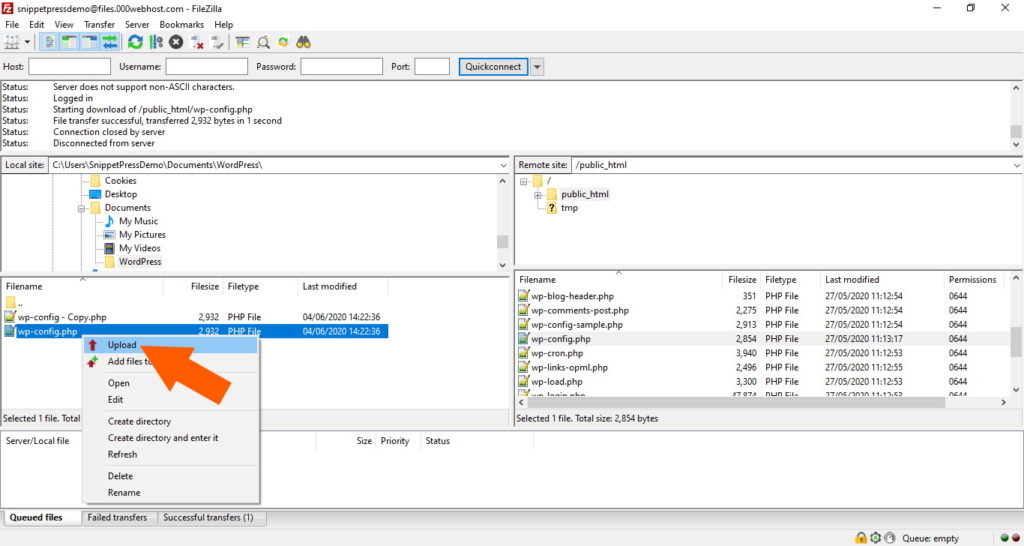
11. Go back on to FileZilla, making sure that you’re in the same folders for the left hand Local site and right hand Remote site boxes as you were before. Now right click the wp-config.php file in the left hand Local site box and click Refresh.
12. Now that FileZilla has refreshed the file, right click on it again and click Upload.
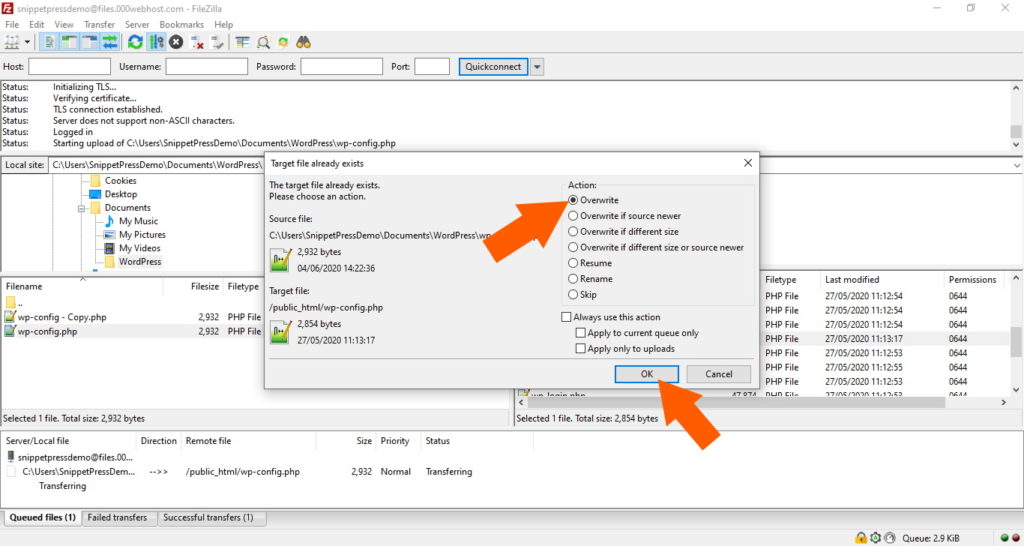
13. You’ll be shown a popup saying that the file already exists in the destination directory. Don’t worry, just make sure that Overwrite is checked and click OK.
14. That’s all there is to it, your wp-config.php file has been downloaded, edited and re-uploaded. If your code doesn’t contain any errors then the customizations will now be active on your WordPress site. Head over to your site to check that everything is working.
15. If you’re presented with error messages or a blank white screen, then something isn’t quite right with your code. You’ll need to go back, fix the code, re-upload it and check your site again, or reinstall the backup that you made earlier. Hopefully though your site is all good and working as it should. If that’s the case then you’re all done and it’s time for a well deserved coffee!